Turn WordPress Into a No-Code Platform
- Yohann Joyeux
- February 7, 2021
If you are interested in WordPress with No-Code as an hybride solution. In this article I will explain you how to build your project successfully with WordPress.
Table of Contents
Why WordPress Is an Ideal Candidate for No-Code Website?
1 – Easy Automation Tools Integration
Remember what I suggested about building an hybrid solution based on 4 components:
- FRONTEND SIDE
- AUTOMATION TOOL
- CRM
- SAAS TOOL
Where Automation platform is orchestrating the communication between frontend side, CRM and others SaaS Tools.
WordPress is already compliant with main automation platform because it’s a very popular CMS, existing since 2003 and Open Source.
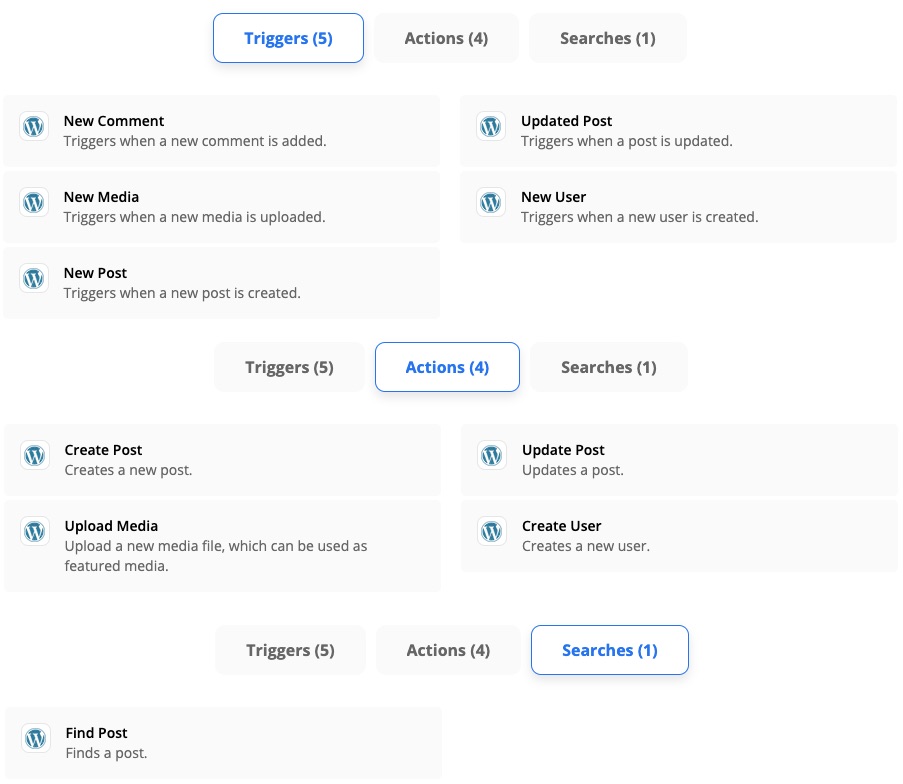
Here are some exemples of pre-existing WordPress events, but remember that you can trigger your own events thanks to WebHooks:
Check on Zapier and see how is it simple to integrate WordPress in few minutes : How to Get Started with WordPress on Zapier
2 – Easy Design Capabilities
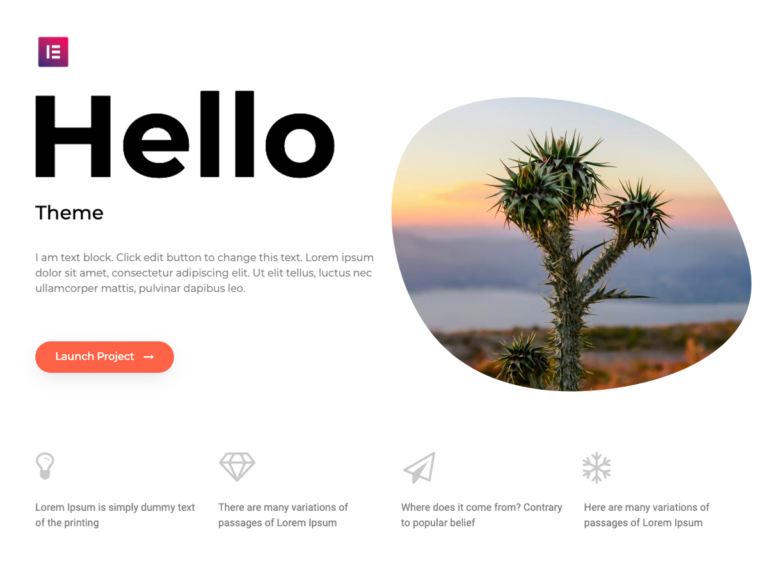
With the famous WordPress plugin Elementor combined with their Hello Theme, you can create any Website design from scratch or based from Design files (PSD, Sketch, Figma…).
Check this video below from How to Convert Your Design Prototype to WordPress
3 – Easy Content Creation
Pages
Both from the admin panel or frontend side, you can create as many page as you want very easily and specifying the Slug for SEO optimization.
Menu
Both from the admin panel or frontend side (Customize Theme), you can add an internal or external page and choose the hierarchy between them.
Custom Posts
With the appropriate plugin Custom Post Type UI, you can easily create any kind of Post Type that represent a structured data type like a car, a property or any kind of service or product you need to manage for your business.
Custom Fields
With the appropriate plugin Advanced Custom Fields, you can easily create many kind of Fields for your specific Custom Post. For example, if your custom post is a property asset, you should need to add adapted fields like a price, the number of rooms, the floor..etc
4 – Easy Forms Building
Always with Elementor (Pro version), you can easily create any kind of form using the Form Widget. Look how it is so simple :
You saw that you can build a form easily and integrate it to several of the more popular email marketing apps like MailChimp, Drip, ActiveCampaign GetResponse and ConvertKit…etc
But for the other SaaS or specific business needs, you will be able to connect the Elementor form with Automation Tools by sending the data to a dedicated Webhook. Lets have a look on this article for a better understanding: Zapier & Elementor Integration.
And for more complexe scenario, watch this article: Integrate Zapier With Elementor and Automate Your Workflow
5 – Admin Backend With Users Administration
From the WordPres Admin panel, you will be able to create, delete and manage all your users very easily.
If you need so, you will be able to add a specific plugins to manage roles and capabilities.
Look at this excellent article about user management in WordPress.
6 – Useful Plugins For Your Project Health
Security
WordPress is open-source and continuously improved by the huge community. This already makes WordPress a very secure software.
But hackers are numerous and tireless so you need the best security for your business and for your customers.
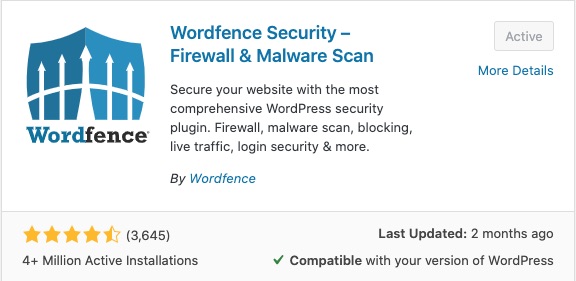
I highly recommend you to use a WordPress Security plugin, like this one free and widely recommended by the community: Wordfence Security
Backups
You always should backup your website (files and data) before any significative change like update WordPress or plugin.
But also after an important content update with many hours spending to write content or customize your design.
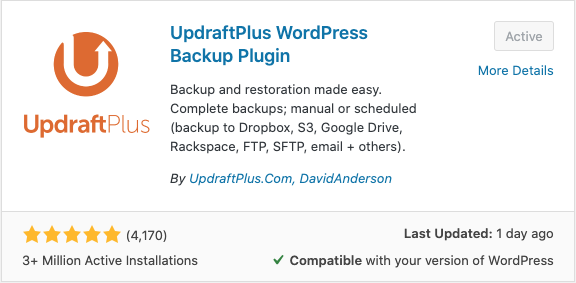
Hopefully, WordPress have excellent plugins that I highly recommend you to use, like this one free and widely recommended by the community: UpdraftPlus
Performance
Performance is always a major topic regarding the user experience and also the SEO score.
Thus, you should take care about it and optimize your page load.
WordPress has many plugin for static ressources with CDN integration, database caching, images lazy load and so on…See this article about WordPress Caching Plugins to Speed up Your Website.
This article could help you to better understand performance optimization on WordPress, but it seems a little bit too much technical for a No-Code approach.
I highly recommend you this two plugins, one for your images upload size optimization, and the other for the global performance.
7 – So Many Other Plugins to Simplify Your Job
And you will find so many others useful plugins, like clone a Post or import/export data, ajax search for many needs.
But keep in mind that plugins need updates, configuration, take some ressources and potential risk of security for exotic ones.
Before you install a new plugin, you should ask you if this feature is better with a local plugin or it could be performed by a SaaS service connected with your Automation tool which is the best design model for my suggested hybrid architecture.
8 – Optimized for SEO
SEO is important if you create a website that should be found by Google search requests.
There are many SEO plugins, but I would like to suggest you Yoast SEO because it has huge recommendations and it is fully integrated with my favorite builder Elementor.
Have a look at this article Yoast SEO and Elementor Integration, where you will find the following video :
Is WordPress Better Than Others?
Pros & Cons
Remember what I wrote about Pros & Cons of No-Code platforms, here is where WordPress is into an hybrid solution
Furthermore, if you use WordPress as hybrid No-Code solution, you will be able to start in full No-Code and when you project will grow up and your business will became profitable, you will probably need a developer team to build the more complexe features or integrations.
Then, if you use a No-Code platform, you will probably have trouble finding this kind of ressources, but a WordPress Senior Dev is really easy to find for a good market price.
What About Mobile App?
If your project is to have an iOS/Android mobile app, you should have a look on this section: The Best Mobile App Builders For Your No-Code Project
If you just want your project to be mobile responsive, then WordPress with Elementor is natively responsive.
Step 1 : Define Your Project
Define the Purpose of Your Website
You must defined the goals of your website. You will spend time and money, so you need to be sure of what you want to do and all the necessary features to please your dear customers.
Lorem ipsum dolor sit amet, consectetur adipiscing elit. Ut elit tellus, luctus nec ullamcorper mattis, pulvinar dapibus leo.
The real estate ads must be found on Google (SEO Optimization).
Our commercials should login to validate ads, customers profils and manage the evolution of sales.
Agencies should register and manage their properties.
Investors should register and buy agency’s properties.
All users should interact through a sales process with sales steps and documents to provide or to sign.
Visitors and users should be able to search, filter and view property details.
Users can add a property to favorites and have a personal dashboard.
Define the Design of Your Website
On this step, you choose the font, color, grid … of what you want your website looks like and make a mockup. You can use Design No-Code Tools or any other tools or help from a pro designer.
You can also be inspired by WordPress Templates, search on google you will find a lot to be inspired.
The real estate ads must have 3 kind of design:
1 – the homepage
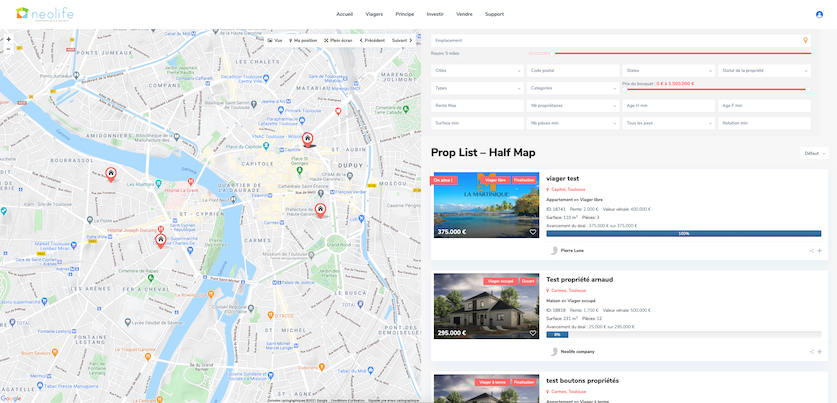
2 – the list and search result page with google map
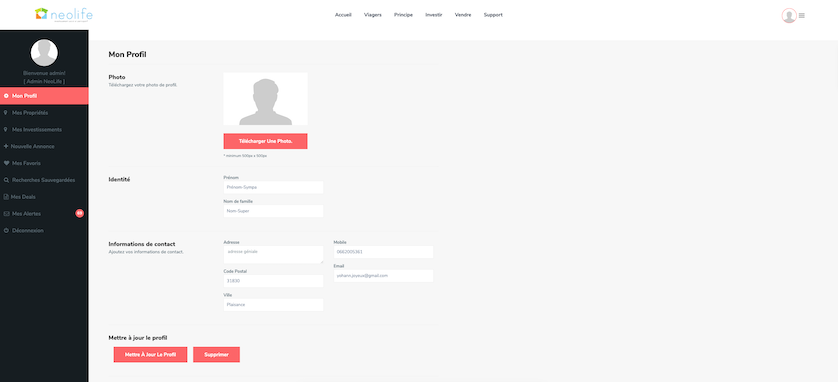
3 – the user’s dashboard to manage profile and properties or investments
Define the User Roles of Your Website
You have to define if there are only visitors or if your customers will register on your site.
You probably be the administrator, but you may need to give access to your commercial team like CRM.
The real estate ads must have 3 kind of users, so 3 corresponding roles:
1 – the commercial (role_comm)
2 – the agent (role_seller)
3 – the investor (role_investor)
Define the Features of Your Website
You probably already know which features you want to implement on your project but you should list them to clarify more.
Once you’ve done that, you should decide which SaaS Tools will be used for each of these features.
I have listed the best SaaS Tools, according to me, by category to help you to find the best for you No-Code project.
The features in our example are:
– a search and filter tool
– a newsletter
– a CRM for commercials
– a document tool for signature, storage and share
Define the Automation Needs of Your Website
In this step, you should think about how your users will interact with you or the SaaS tools through all the features of your project.
The Automation needs in our example are:
– manage the Newsletter
– send mails
– update CRM
– upload files
– request eSignature
Define the Pages & Screens of Your Website
This step is very intense. You will define :
- all the pages in your project and their user access
- the content on each page and the user’s visibility
- the popups if you have
- the interactions and the possible response
- the forms, their validation and their error or success messages
This work is too important to display all as example. Sample of important pages:
– Homepage with header, menu, footer, last ads, search tool and testimonials
– Grid list of properties
– Map list of properties
– Contact page
– My Profile (logged user only)
– My Properties (role_seller only)
– Add Property (role_seller only)
– My Favorites (role_investor only)
– My Investments (role_investor only)
– My Deals (role_comm only)
– My Alertes (logged user only)
Step 2 : Install WordPress
Choose the Hosting
You can pick on of the following WordPress hosting I have selected for you on this page: The Best WordPress Hosting For Your No-Code Project
This hosting could come with a web domain name or you could transfert your domain name but this is more tricky.
You can try the basic formula and adapt it later, but check that you have a SSL included for HTTPS…yes, security matter!
Install The Core WordPress
To install WordPress, you just need to follow one of this tutorials depending on the hosting you choose. But WordPress is very simple to use and install. Don’t worry, you do not need any developer skill.
Let’s have a look on this article: How to Install WordPress – Complete WordPress Installation Tutorial
Install The Basic Plugins
It is very easy to install and activate plugins from admin panel, but if your are new to WordPress, you can follow this tutorial : How to Install a WordPress Plugin – Step by Step for Beginners
To complete, secure and extend the WordPress features, let’s install the following FREE WordPress plugins :
ACF to REST API
Exposes Advanced Custom Fields Endpoints in the WordPress REST API.
Admin Columns
Customize columns on the administration screens for post(types), pages, media, comments, links and users with an easy to use drag-and-drop interface.
Advanced Custom Fields
Customize WordPress with powerful, professional and intuitive fields.
Custom Post Type UI
Admin panel for creating custom post types and custom taxonomies in WordPress.
Duplicate Post Page Menu & Custom Post Type
The best plugin to duplicate post, page, menu and custom post type multiple times in a single click.
Ele Custom Skin
Elementor Custom Skin for Posts and Archive Posts. You can create a skin as you want.
Elementor
The Elementor Website Builder has it all: drag and drop page builder, pixel perfect design, mobile responsive editing, and more. Get started now!
Intuitive Custom Post Order
Intuitively, Order Items( Posts, Pages, ,Custom Post Types, Custom Taxonomies, Sites ) using a Drag and Drop Sortable JavaScript.
Nav Menu Roles
Hide custom menu items based on user roles.
Smush
Reduce image file sizes, improve performance and boost your SEO.
WP Super Cache
Very fast caching plugin for WordPress.
UpdraftPlus
Backup and restore: take backups locally, or backup to Amazon S3, Dropbox, Google Drive, Rackspace, (S)FTP, WebDAV & email, on automatic schedules.
User Role Editor
Change/add/delete WordPress user roles and capabilities.
Visibility Logic for Elementor
Hide or show Elementor widgets based on user conditions.
Wordfence Security
Wordfence Security – Anti-virus, Firewall and Malware Scan
WP Mail SMTP by WPForms
Reconfigures the wp_mail() function to use Gmail/Mailgun/SendGrid/SMTP instead of the default mail() and creates an options page to manage the settings.
Yoast SEO
The first true all-in-one SEO solution for WordPress, including on-page content analysis, XML sitemaps and much more.
Zapier for WordPress
Zapier enables you to automatically share your posts to social media, create WordPress posts from Mailchimp newsletters, and much more. Visit https://zapier.com/apps/wordpress/integrations for more details.
Remember that HTML Forms are really important in our hybrid solution and it’s time now to decide to buy a professional tool to make forms and it must be able to integrate with an Automation platform.
You can look at my selection on page The Best Form Builders For Your No-Code Project, but for price and consistency, I will recommend you to buy Elementor Pro (start to 49$/year).
Elementor Pro will come with support, nice features and of course Forms Widget fully compliant with Webhooks used by Automation platforms.
Elementor Pro
Elementor Pro brings a whole new design experience to WordPress. Customize your entire theme: header, footer, single post, archive and 404 page, all with one page builder.
Configure Plugins
Configuring Wordfence Security plugin:
The very first plugin to configure is that WordPress security plugin.
You will have to setup you email in order to let Wordfence send you security alerts for your website. You don’t need to be premium, the basic will make your site really secure.
Wordfence will also ask you to optimize the Wordfence Web Application Firewall, let’s do that.
Wordfense will ask you to stay up-to-date automatically. I I recommend to choose “Yes, enable auto-update”.
Configuring UpdraftPlus plugin:
The second plugin to configure is that WordPress backup plugin.
Go to UpdraftPlus > Settings.
Then, choose your remote storage, “Google drive” for example. Update the “Files/Database backup schedule” for automatic backups and save your modifications.
Now, from UpdraftPlus > Backup/Restore, perform your first backup and check the result.
Configuring Smush plugin:
Smush plugin is for images optimization, that will allow you to automatically and manually resize images uploaded in WordPress.
This will help you to get a faster website and best SEO ranking.
Just follow the wizard configuration and keep default values to start.
Configuring WP Super Cache plugin:
This plugin helps your site to render faster by caching statics files and others configuration.
Go to Settings > WP Super Cache, on “easy” tab, choose : “Caching On (Recommended)” and click “Update Status” button.
That’s all for the moment !
Configuring Yoast plugin:
Yoast plugin will help you to optimize the content of you page, article in the goal to have a better SEO and ranking.
Go to Yoast > General, and launch the configuration wizard with default values.
We will relaunch the configuration wizard later, after the creation of our content type.
Configuring Elementor Pro plugin:
Go to Elementor > License, and activate your license by connecting to your Elementor pro account.
Configuring WordPress URL Settings:
Go to Settings > Permalink, and select “Post name“, example : https://yourdomain.com/sample-post/
Install & Configure Theme
Theme is the structure of your website, the appearance part, not the content.
From admin panel, go Appearance > Themes, and Add a new theme :
Search for “elementor hello” you will found the Theme optimized for elementor website builder.
Install and activate it.
Step 3 : Create Your Custom Objects
What are Custom Objects? WordPress has been created in 2003 for publishing Blogs articles in a CMS (Content Management System).
But since 20 years, WordPress has evolve and became now more than that. One powerful feature of WordPress is the Plugins. And you can now extend the WordPress features with free and professional plugins given to the community.
But the more plugins you install, the hardest work is to be vigilant about security, consistency and compatibility with new WordPress versions and other plugins.
So, you have to choose wisely which plugins you want to install and compare it to the benefit provided for your activity.
That’s why, I choose for you this two important plugins :
This will help you to create any kind of content without being obliged to install a specific plugins for your product or service.
WordPress is build to display and search Posts (Single detail or Archive list) and attribute specific taxonomy (meaning category or tags for example). But native WordPress Posts has only few content metadata like :
- Title
- Description
- Excerpt
- Featured Image
- Taxonomy
- Author
- Creation/Modification Date
Maybe its not enough for your business needs. You should probably need more fields and maybe severals kind of content with all different fields.
So it’s time for you to define what kind of content you want to display on you website. Is it services, products or just a blog? It could be a pets ads website or a cars magazine …
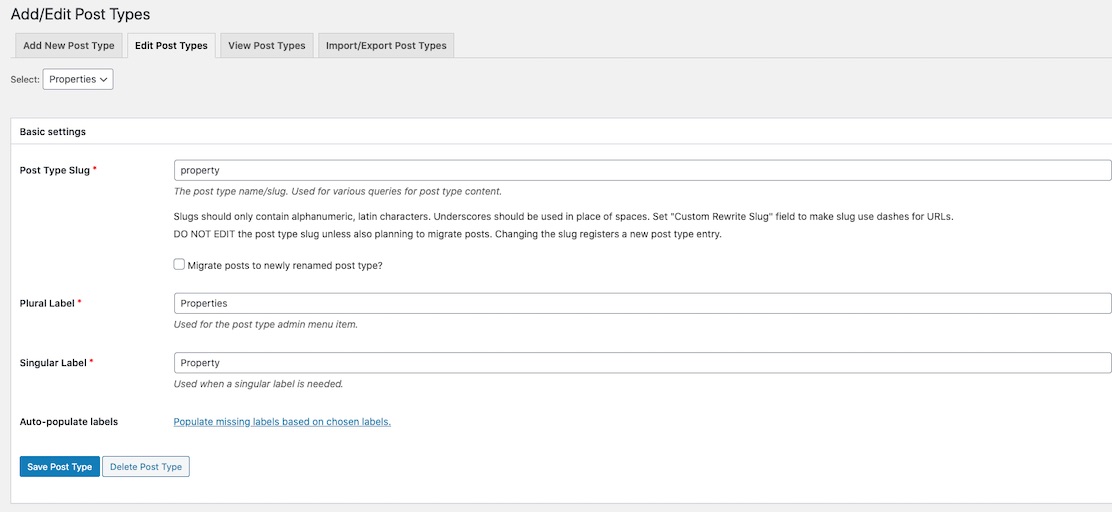
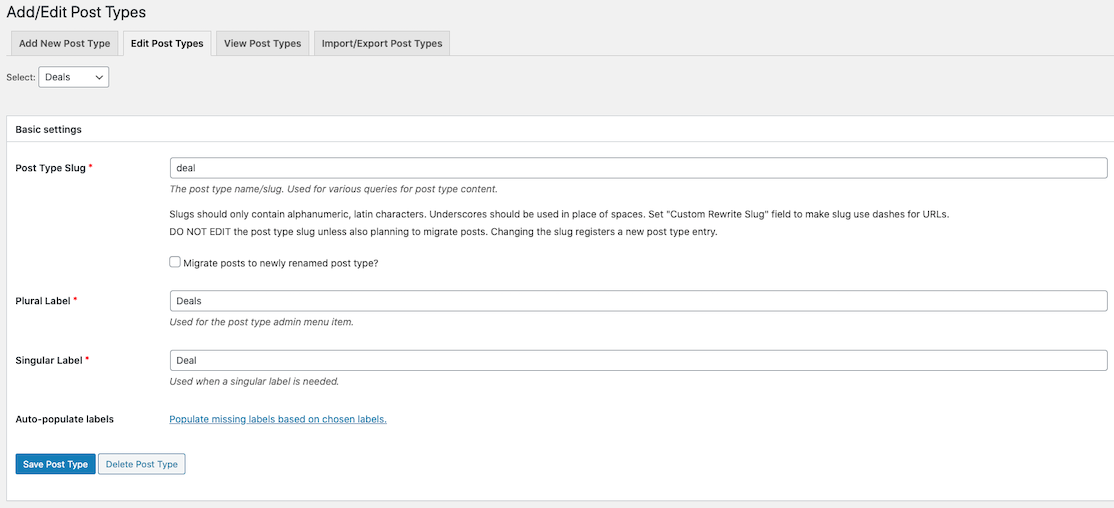
Custom Post Type
Custom Post Type is the kind of object you want to expose on your website.
Custom Post Type UI plugin is made for creating you own kind of content and not only native WordPress Posts.
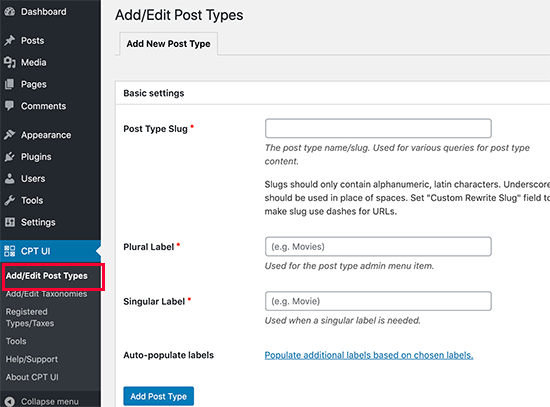
Go to CPT UI > Add/Edit Post Types :
- Fill the mandatory fields
- From Settings section, update field “Has Archive” from False to True
- Save with “Add Post Type” button
You can have a look on this article, read section Method 1. Creating a Custom Post Type – The Easy Way
You could follow this tutorial to understand deeper the existing Options
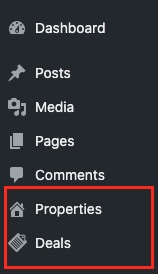
Our Objects type type will be :
1 – Property
2 – Deal
3 – Blog Post
Property is a specific kind of content, far away from original WordPress Post, so we need to create this kind of Custom Post Type.
Deal represent the investment of an investors regarding a Property. A Custom Post Type too.
Blog Post is exactly what WordPress offers without any effort, so we will use them as is to post news, advices about property sales.
Custom Taxonomies
Lorem ipsum dolor sit amet, consectetur adipiscing elit. Ut elit tellus, luctus nec ullamcorper mattis, pulvinar dapibus leo.
Custom Fields
Custom Fields are the extra field for a Custom Post Type. This will extend the native WordPress Posts content metadata.
You can add many different kind of metadata such as Text, Number or Email fields but also field related to other Custom Post Type with Relationship or Post Object.
Look at all the field type possibilities.
Create Sample Data
In order to create links between Post Type and Custom fields, you should create some sample data, in order to play with those fields and be able to see the result online without waiting to have the real data.
Step 4 : Create Users
Most of the time you will have to manage users, roles and access to your content or pages.
WordPress have a core component to manage users but you will need some additional plugins for your needs.
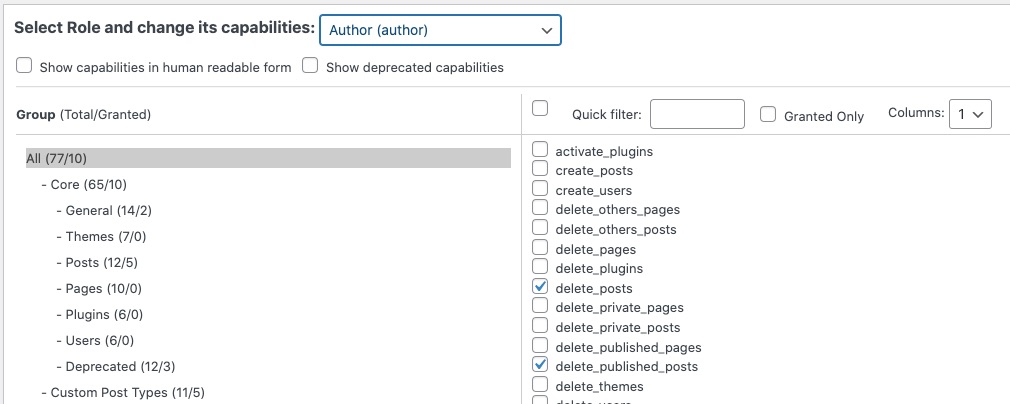
Create User Roles & Capabilities
Roles group together capacities (rights). They are assigned to users according to the list of rights that we want to assign to them.
You will need this plugin : User Role Editor
Then, you will be able to create new role and assign capabilities very easily.
User Profile
The plugin Advanced Custom Fields will allow you to create also custom fields for the users.
Magical, it’s so easy to use.
Juste use the admin panel, go to Custom Fields > Field Groups.
Create a new one dedicated for all users or only a type of users and add custom fields as so easy as you already done for custom post type. You just need to specify the right scope here “User Role” :

User Registration
WordPress allows you to let you choose if user can register or not.
Go Settings > General, and activate “Membership” Anyone can register or not.
If you want user can register, then you will need a registration page.
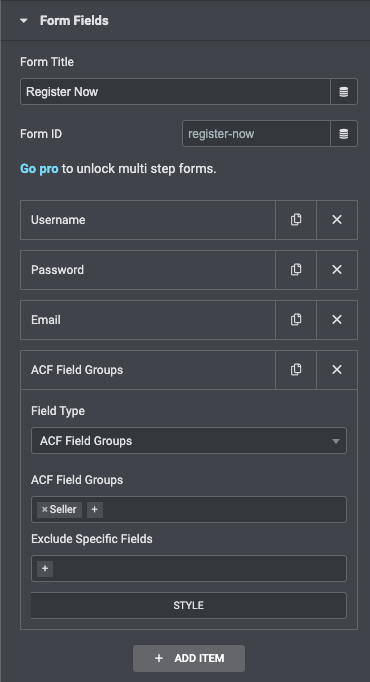
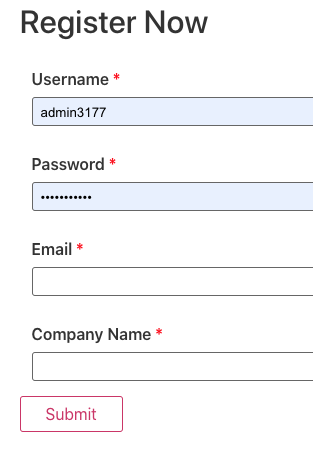
You can easily create a new page and use the ACF Frontend Form plugin this will show standard WordPress fields :
- username
- password
If you have created custom fields for users, you can also select the custom fields group you want to display, example with “Company Name” :
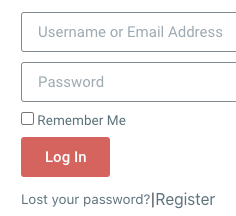
User Login
Elementor offert a standard “Login widget” which I recommand you to use, very easy to configure.
User Notifications
We must distinguish two types of notifications, transactional messages (linked to the creation of the account, loss of login details, etc.) which are linked to WordPress and notifications (SMS / email) which correspond to your business.
In the first case (transactional) I recommend you to use this plugin: Custom Notifications and Alerts for WordPress
For your business notifications, let’s continue to use an automation tool with a connection to a dedicated notification system.
User Access
You may need to control user access both on page level and then in content restriction.
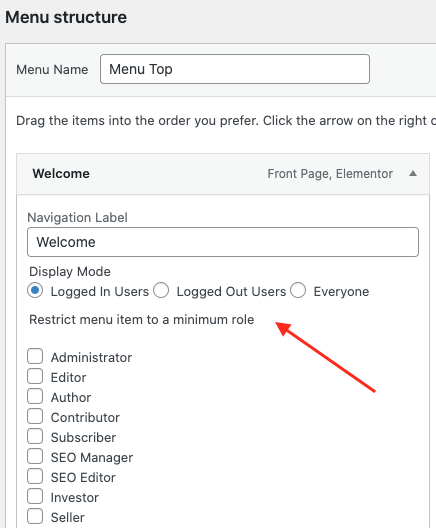
Page access, use this plugin :
Easy to configure in the menu setting (Appearance > Menus), give access to login or not login or to a specific role :
Content restriction : use this Elementor Widget for a complex user restriction :
This Elementor Widget will display a new tab “Visibility”:
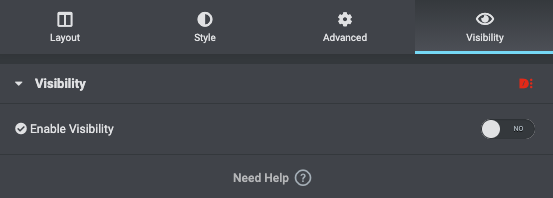
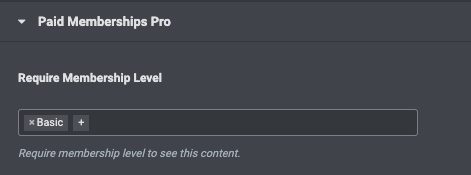
User Membership
If you need to manage subscriptions for your business and that those user’s membership levels give access or restrict some particular content, then you should consider this nice plugin fully integrated with Elementor Pro :
You can manage subscription on registration page or later.
You can define free membership and also automatic recurring payments and be integrated with most famous payment gateway like:
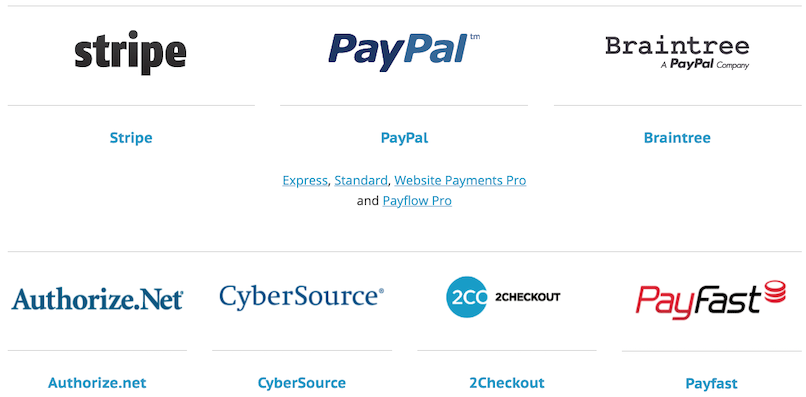
Step 5 : Create Pages & Navigation
Pages
Pages and web browsing are the backbone of your website.
Its design is reflected upstream and it results in the different pages and interaction between all the pages.
WordPress natively allows you to create pages and menus for navigation.However, for page editing, I invite you not to use the WordPress HTML text editor but Elementor and its various HTML widgets.
Once you have created a Page and click on it from admin panel, use the following button to switch to Elementor.

Then follow the official documentation and all video tutorials supported by a huge community.
Homepage
Once you have created all the needed pages, you can select one to be set as HomePage, meaning the page that will appears when you dont add anything after your domain name https://www.your-domain.com
From WordPress admin Panel, go to Settings > Reading and select the option “Static page” and select the Page on the section “Homepage”.
Menus
Menus are native composant of WordPress.
Go to Appearance > Menus and build your first Menu.
You can build as manu menu as you want for top, main menu position, footer… You will be able to target it from Elementor Widget with the name of the menu.
Elementor Templates
Templates are pre-defined HTML content with cool visual design that will inspire you and let you win some time to have a fantastic result.
Elementor Pro comes with many sexy templates, but you can also build yours and reuse them indefinitely.
More infos on Elementor Template and a quick introduction here:
Display Single Post
Elementor Theme Builder allows you to design your own single post template from scratch, no coding skills needed.
With ACF plugin you will be able to extend the content ability and display custom fields as easy as standard Post fields.
Have a look on this webpage for standard Post fields or look video:
Then for a complete tutorial & demonstration of what can be done with Elementor Pro and ACF, have a look on this great video:
Display Archive Posts
WordPress Archives make it easier for users to access all posts that have something in common. You can create an archive based on a date of publication, content type, or taxonomy.
More infos on this page and follow this video:
Practical example with real easte website
Posts can be flagged in a same taxonomy, like Categories for exemple, and you may want to display only posts belonging to a certain category.
Here a very interesting tutorial describing how to display single and archive of posts with custom fields based on the construction of a real estate website:
Step 6 : Create Search Tool
Basic Search
WordPress has a native search composant where you can search in post title and post content. The result is displayed as a kind of archive page.
Elementor let you make a customized search page results for any king of custom post type but also taxonomy.
Have a look here and watch video:
Advanced Search
If your products are more complex than a title and a content, you may need to offer to your customer an advanced search tool in order to give them a better experience.
For example, a real estate site display house, flat with size, rooms, area, price… so advanced search is more than useful, it’s essential for UX.
If you have WordPress/PHP developper skills in your team, you can use the WordPress core API to manage a complex search form through WP_Query :
But If you don’t, and that the purpose of this site “Go No-Code”, I strongly recommend you to use a WordPress plugin.
WordPress Search Plugin
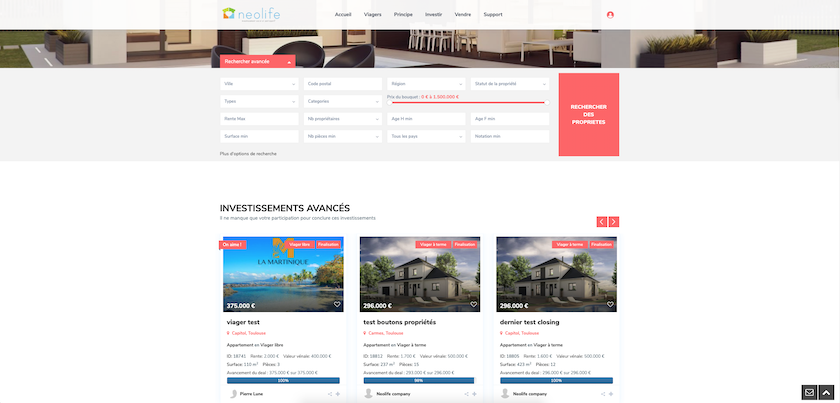
You can find many WordPress plugin but I found that this one is simple, nice performance, working with Elementor + ACF custom fields.
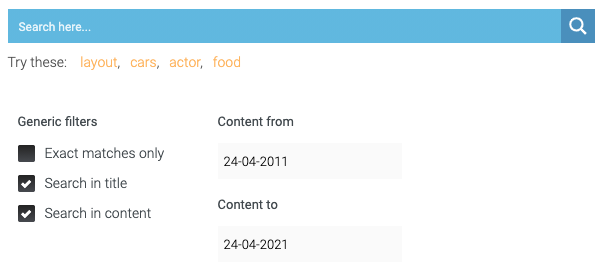
It offers many many configuration options and limitless design customizations:
Furthermore, you will be able to add generic filters and also custom filter based on ACF custom fields.
Result could looks like this: